This article is about the various ways to mount photos the traditional way. As usual, there isn't just one way to do it - there are lots of options depending on your preferences. If you like, we'd be happy to send you a small set of photo corners and a sample of our paper to try it yourself. Just send us a note by contacting us here and we'll be in touch (if you're outside the USA, we might ask you to help us with the postage cost.)
We're often asked about the best way to mount photos in our albums. Our Photo Albums are traditional bound books, and they do not have plastic pockets or other "built in" ways to insert photos. We choose a thick and heavy paper stock to attach photos to and sew tabs between pages to accommodate for the thickness of photos so the book doesn't bulge out when it is filled with pictures.
Click here for more information on our Photo Albums. You can also watch our 15 minute video.
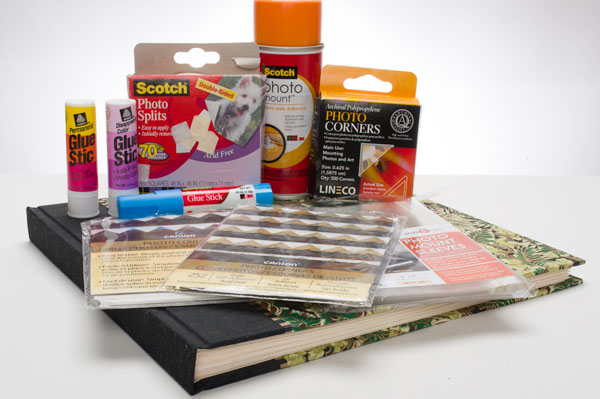
There are a number of different ways to mount photos in our albums, ranging from traditional photo corners, double sided sticky tape and a variety of glues.
This article shows a few of these; while we have our preferences, you may have your own.
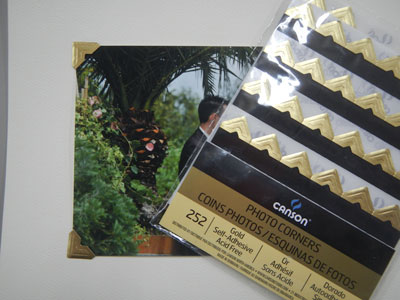
 Our preferred way to mount photos is the most traditional method of using photo corners. They hold the picture securely without glue touching the picture. Photo corners don't care about the quality or type of photo paper used - they work equally well with a glossy photo as they do with a matte paper stock. They are also relatively easy to mount. We just slip one on opposite corners of the photo, remove the adhesive backing, and place the photo with the corners in the book. You can then attach the other two corners easily. Another advantage of corners is that the photos can be removed and replaced.
We like the photo corners from Canson. They come in different colors and styles and are well made. Lineco makes transparent corners that I've used and really like as well. Both are acid free, which is important to protect your photos for the long term.
Another method would be using double sided sticky tabs - Scotch makes nice ones called "Photo Splits" They work quite well. The photo splits are great if you like a very clean look without any corners - all you will see is the photos themselves. You can remove a photo that has been put on with photo splits if you're really careful and patient. You can use a kitchen knife to slide between the page and the photo's back and carefully "worry" the photo off the page.
Glue sticks seem the easiest way to attach photos - simply rub the glue on the back of the photo and stick it on. Our experience with glue sticks has been mixed. One problem is that it is hard to see the glue on the back of the photo. Avery has an interesting solution with their "disappearing color" stick - when the glue is first attached, it has a light purple color that fades after a while. It makes it much easier to see which part of the photo has glue on it.
With both Avery sticks, we found the bond between the picture and back to be less than strong. This can be an advantage if you just want to temporarily lay out the photos and permanently attach them later. It may be safer to use the Scotch "restickable" glue stick for this. It actually worked quite well for us. It holds the photo well, but it comes off easily.
There are many more glue sticks from different manufacturers, and we haven't tried them all.
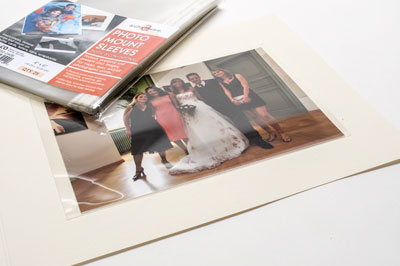
 We've also used Photo Sleeves, which are clear plastic sleeves available in 4x6 or 5x7 format. These sleeves attach to the book by two adhesive strips in the back. The photo is then simply slid in from the side. Since the sleeve covers the entire photo, it is protected from dust or finger prints; at the same time, it's a little harder to see detailed through the reflective plastic.
Finally, we tried the Scotch Photo Mount adhesive spray. It makes for a very strong bond, and the photo cannot be removed once it is stuck on. The spray is a little hard to use - you have to cover the back of the picture evenly and fully, and be careful not to put too much glue on it, as it will seep through the paper and show as a spot. We think the adhesive spray is best for special applications for those who are comfortable using a more permanent solution.
There are many more solutions to attach photos, and we haven't explored them all. Whichever method you use, be sure that your glue is acid-free and photo-safe. Glues like rubber cement are not, and will deteriorate the paper over time. Choosing the right photo mounts, and taking the time to attach the photos will create an album that will last generations.

